
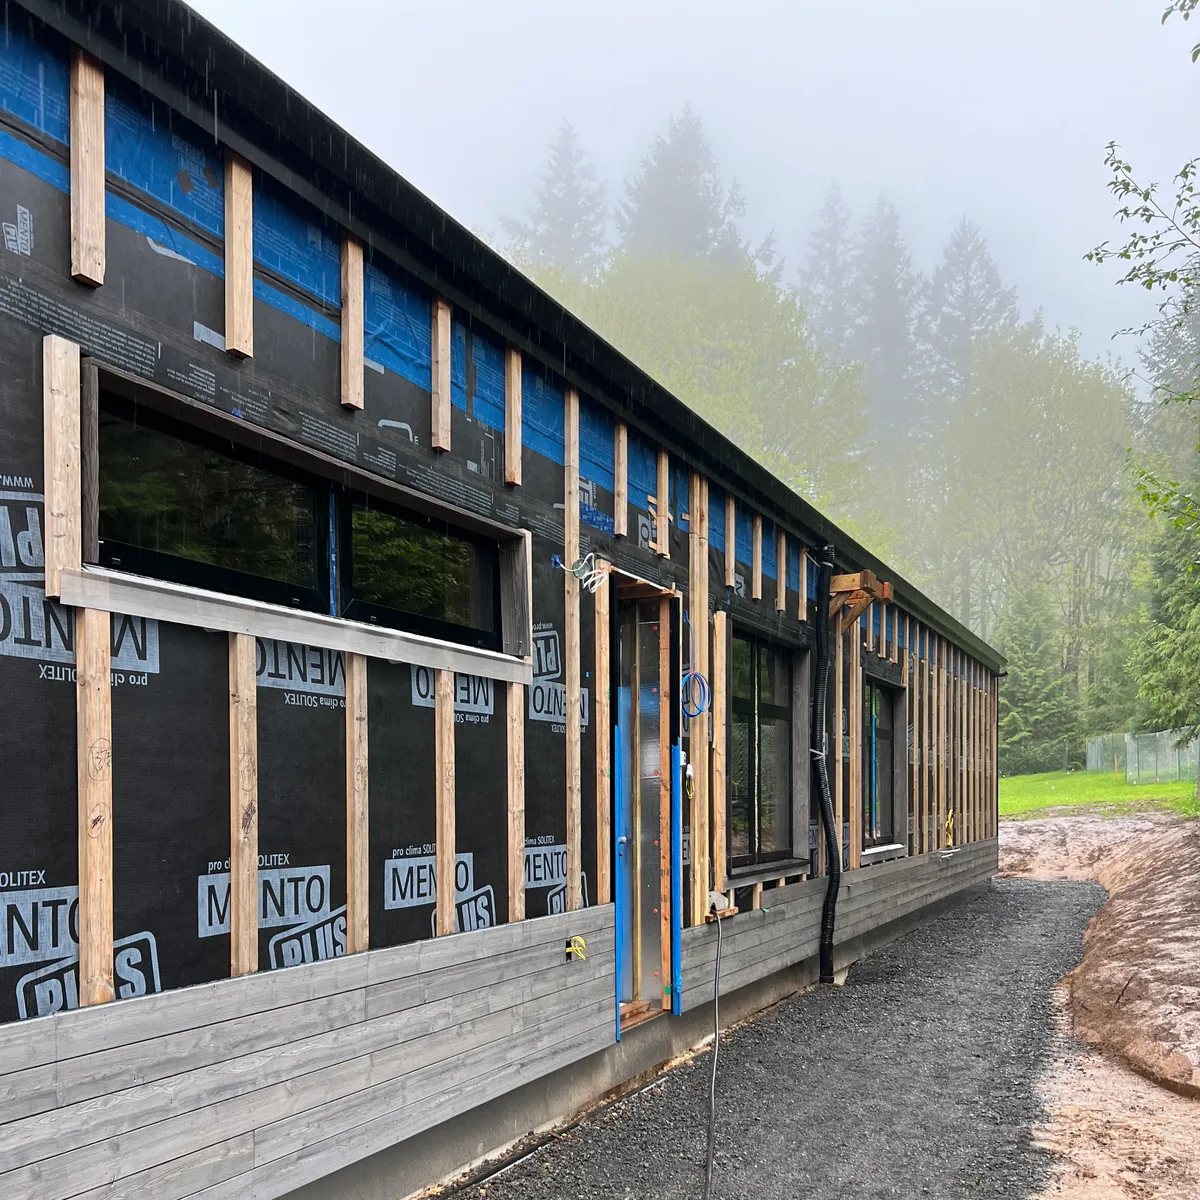
A few years ago I was up on a ladder at one of our houses under construction, looking at something near the soffit. The wall in front of me ran two full stories, so the rain screen behind the siding went up about 16 feet without a break. It was a very Oregon day, sunny and then cloudy and then sunny again.
The sun came out and hit the wall, and I heard a sound I couldn't place. A second later I felt it. Air was blowing out of the vent gap at the top of the wall, hard enough that I could feel it on my hand. All the air in those bays, 3/4 inch deep and just shy of two feet wide, running two stories tall, was being pushed out a half-inch slot at the top. It was like standing in front of a hairdryer.
I'd been building rain screens for years by then, and I understood the science. But standing there, I got it in a very visceral way, a way I hadn't before. Now when a client asks why we insist on a rain screen, that's the story I tell them, because once someone can picture it, the conversation changes.
I got to talk through rain screens recently with Mike Maines of Mottram & Maines Architecture in an IMW Backroom conversation hosted by Charlotte Mustard. Mike and I have both been building them for more than 15 years, starting while the details were still being worked out, and a lot of what we learned the hard way has since been confirmed by research. A few of his points made their way into this post.
The research backs up what I felt on that ladder. John Straube of RDH Building Science has explained that the sun drives most of the airflow and drying in a rain screen gap, and it does that work right when there's energy available to evaporate water.
What is a rain screen, and what is it doing behind your siding?
A rain screen is a gap between your siding and the water-resistive barrier (WRB) on the wall behind it. The WRB is the layer, usually a membrane or a coating on the sheathing, that keeps liquid water out of the wall. The gap gives any water that gets past the siding a clear path to drain out the bottom, and it lets air move through so everything can dry.
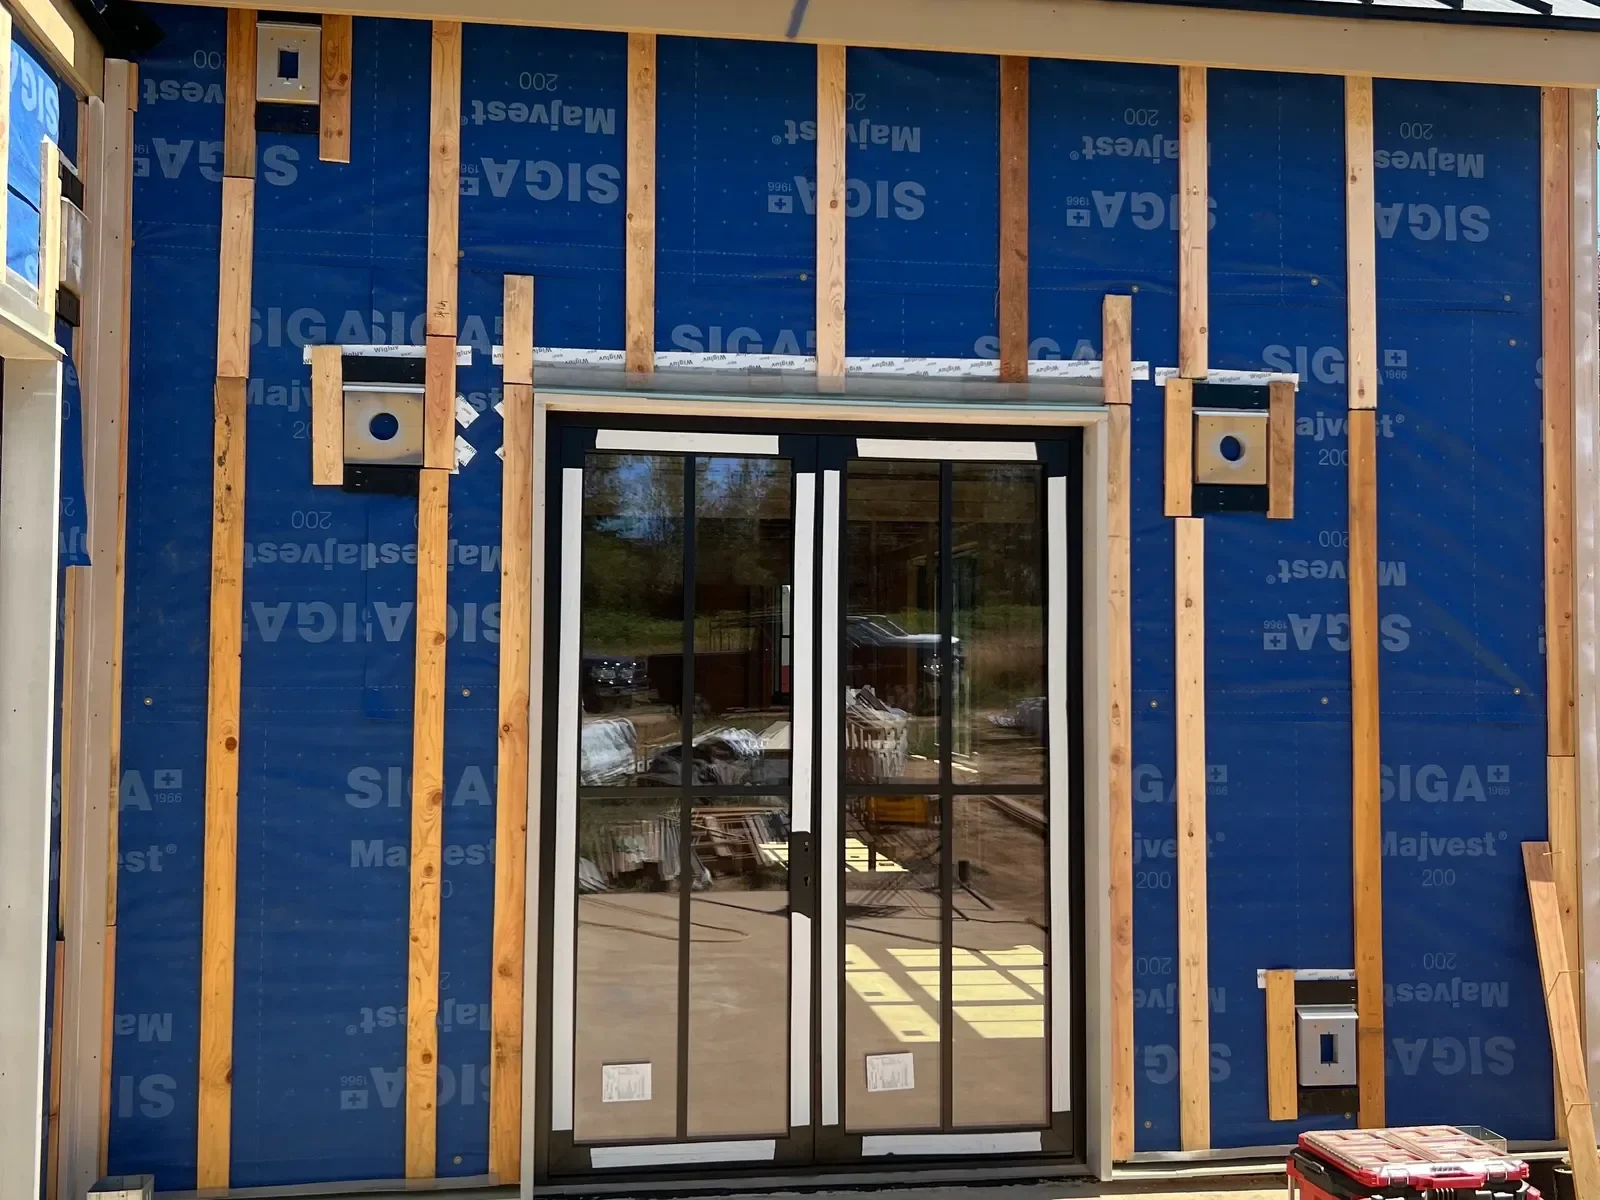
Siding lets more water through than most people expect. Mike put it well. "It's surprising how much water gets behind the cladding in the first place," he said. "I think most people assume the cladding is keeping all the water off."
How much water gets past the siding varies a lot with the type of siding, how it was installed, and where the house is. Open-joint cladding is a good stress test, because it lets far more water into the cavity than typical siding does. In lab testing John Straube shared at Building Science Summer Camp this year, open-joint cladding over mineral wool insulation still held up well with a gap behind it. Between 50 and 60% of the water that got past the siding drained down its front and back, and less than 1% reached the WRB. That's a big deal, because the WRB is one of the critical layers protecting the structure.
Draining the water is only half the job, though. Even in a wall that drains well, water hangs around. Drops can bridge a small gap, water soaks into the pores of the siding and the battens, and surface tension holds it in place. That retained water is what airflow takes care of, and it's why I want a ventilated gap, open at the bottom and the top, not just a drainage layer.
Mike describes it as good, better, and best. Drainage wraps and thin mats are good, a deeper gap ventilated only at the bottom is better, and a deep gap ventilated at the top and bottom is best. He breaks down gap size in detail in his post on rain screen gap size and furring strips.
Wood, water, and why
At Birdsmouth, we self-perform what we call wood and water. Our crew does the framing, siding and the interior carpentry, and we also handle everything that has to do with water: the WRB, the window installs, the rain screen, and the air barrier. We have trusted partners that take on the tile, the sheetrock, electrical, painting and other finishes. But water is the thing that's going to destroy a house, so we keep it in-house.
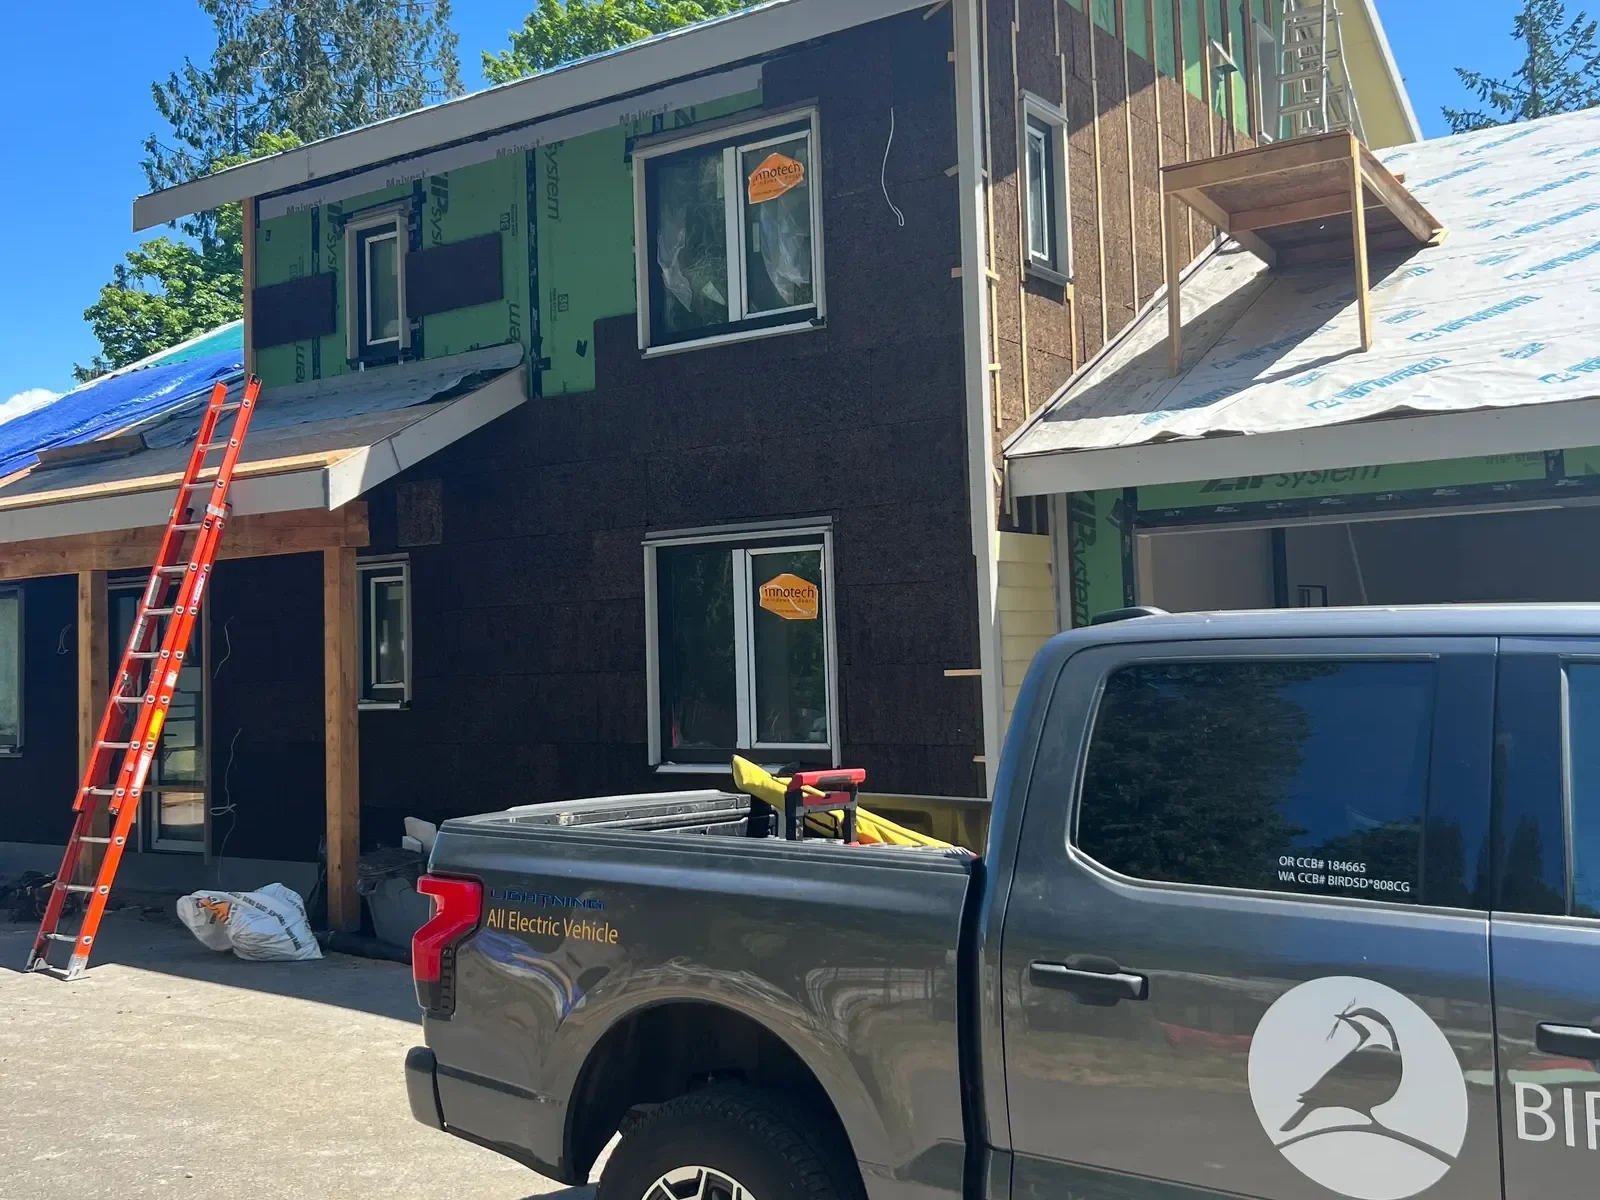
That decision has paid off in ways I didn't fully expect. The newest carpenter on our team has never built a wall without a rain screen, because that's how he was trained from day one. There's no pushback, no one cutting corners on a detail they don't understand, and no missed handoff where something gets lost between trades.
It wasn't always this easy. The first full rain screen we built had Zip System sheathing, cork exterior insulation, and flat trim around the windows, and it was all new to us. We had an architect who was game and a siding crew who didn't push back, which was lucky. The hard part was detailing the assemblies, because there wasn't much out there to draw from. There was a lot of back and forth, and things changed once we got on site. In the end it worked out really well and we were able to carry the lessons learned and concepts forward to our subsequent work.
What siding water damage looks like when you open the wall
The best way I know to explain why details matter is to tell you about a wall that failed.
We were called out to a house where the owners had noticed some damage and a smell below their windows. When we explored things further, we found the siding was starting to pop off in places. The strange part was that the house had a rain screen, and the reclaimed wood siding itself was fine.
The problem was the battens. Whoever built it had ripped strips of fiber cement siding to use as rain screen battens, and at first I didn't see an issue with that. Fiber cement seems about as durable as a material gets. They'd even done the right thing and used coated exterior screws.
What happened is that driving each screw through the fiber cement ground the coating right off it. That left bare steel sitting right where the screw passed behind the batten, and over time enough moisture got there to rust the screws clean through. By the time we saw it, you could put your hand behind the siding and whole sections would just come off the building.
Looking back, it makes total sense. Strip the coating, expose the steel to moisture, and it rusts. But I never would have predicted it, and neither did whoever built it. The lesson I took from it is to be careful using a material off-label, even when it seems durable, because the problems can hide for years.
Is a rain screen worth it?
For us, yes, and it isn't close. I would never do a siding project without a rain screen. It would be like driving without a seat belt, something you just wouldn't do.
There are honest tradeoffs, and I think they're worth naming. A rain screen costs money and time. Even Straube has pushed back on "rain screen good, rain screen always" thinking, and he's asked whether that same dollar might do more as an upgrade to a fully adhered WRB on some projects. Climate matters too. Mike pointed out that a dry climate like Colorado is more forgiving than wetter areas like the Northeast or Pacific Northwest.
Here in marine climate zone 4C, it's damp much of the year, and that answers the question for me. We build durable houses first, and a wall that can drain and dry is a big part of that. In my experience, you can't call yourself a quality builder if you skip it.
Clients have come around too. Mike said he hasn't heard a cost complaint about rain screens in years, and I've seen the same shift. It's become an expected part of a good wall.
Rain screen details for vertical siding
Vertical siding is more popular than ever, and it makes rain screens more complicated. Vertical boards need horizontal strapping to nail into, but horizontal strips block water from draining down and air from moving up.
The traditional fix was to cross-hatch the strapping, with vertical strips against the wall and horizontal strips on the outside. That works for drainage and airflow, but two layers of 3/4-inch wood makes a gap about 1 1/2 inches deep. Straube's guidance puts fire risk rising once a gap gets past about 1 inch, so it's worth thinking hard about that approach, especially in wildfire country. Builder John Deans calls his version of this cross-strapping style a "basket house," which is a pretty good description of what it looks like.
A lot of builders, including us on part of a current project, run the strips at 45 degrees instead. The idea is that you can still nail vertical siding to angled strips, and air can still rise through the gap to dry things out. Straube has said diagonal strapping gives decent ventilation and drainage. I'll be honest that I can't tell you how well a 45-degree gap dries compared to a straight vertical one. Additionally, around windows and doors, where your nails and trim have to land, it can get obnoxiously complicated. This is especially true if one is paying attention to allowing gaps for airflow at doors, windows and corners.
There are also rigid products designed to stand the siding off the wall so you can fasten right through them. Whatever you use, I like to see at least 3/8 inch of gap, because that's where you start getting real airflow and drying.
Rain screen details around windows
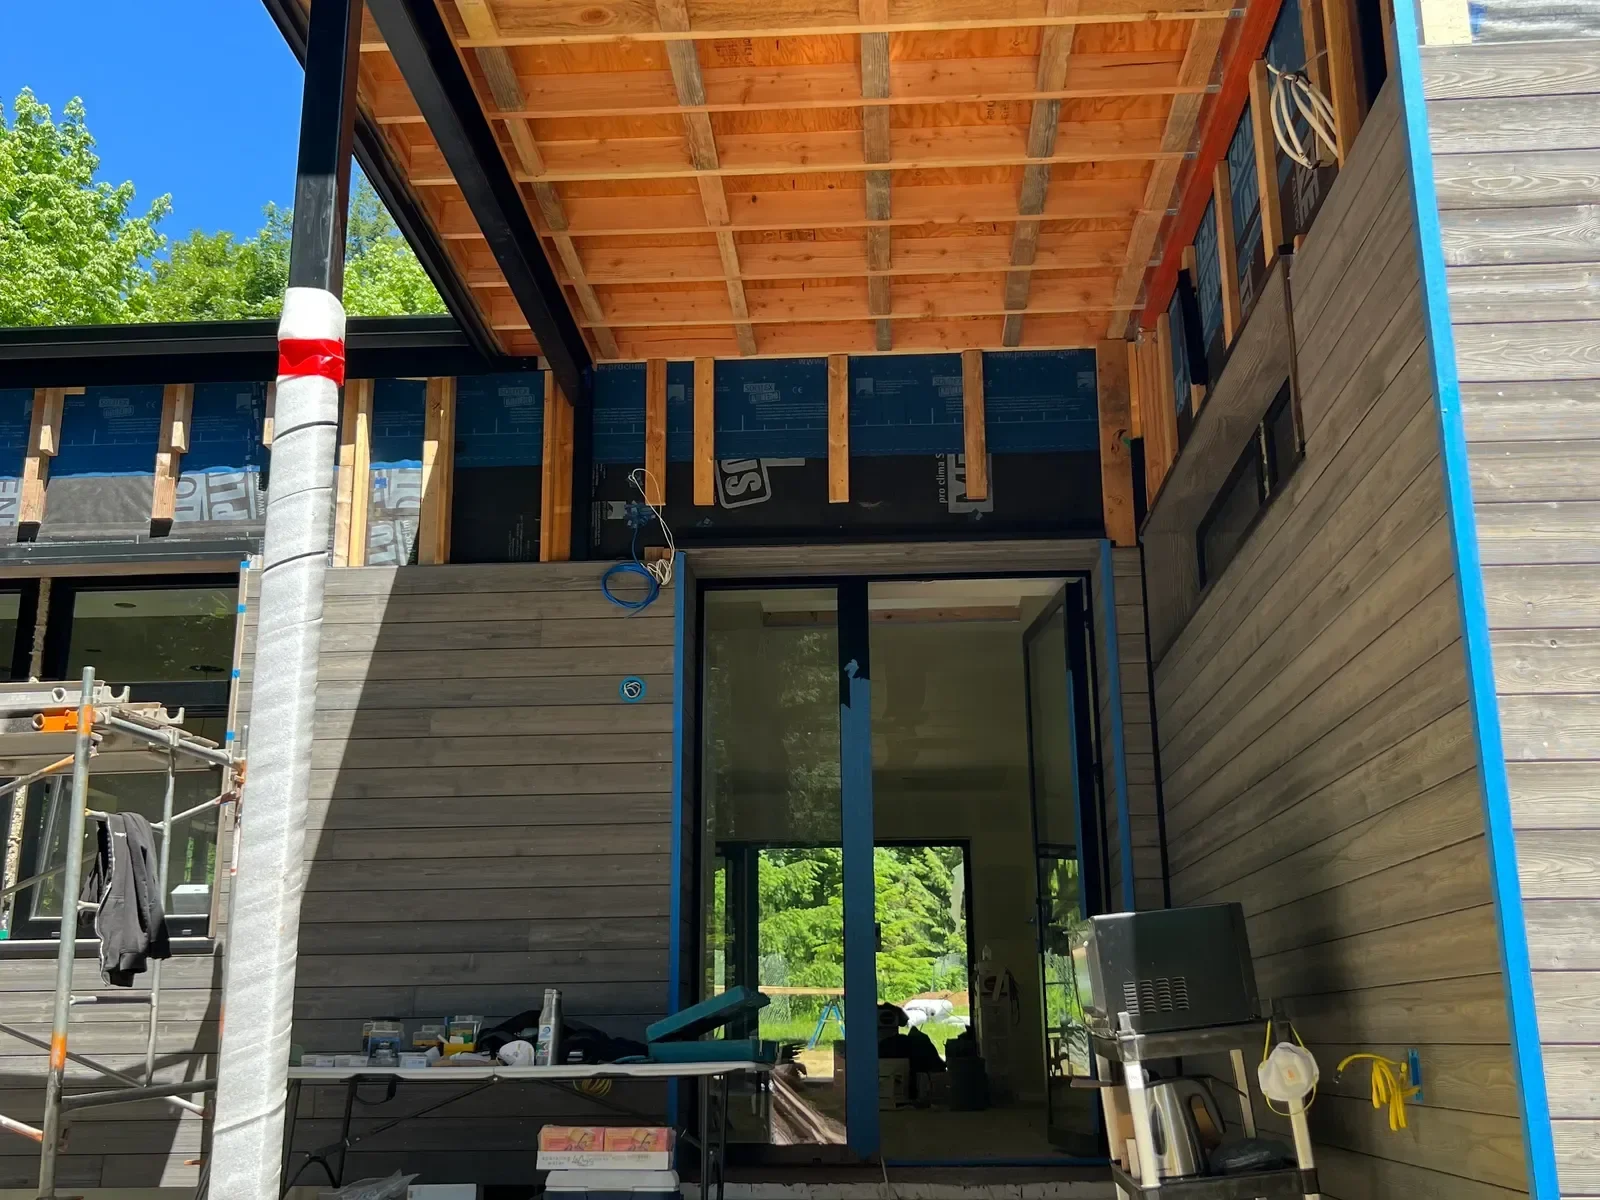
Windows are where rain screens get hard, and after all these years, we have rarely done the same detail twice on a building.
That's partly because we're a custom design-build firm. Every project is different, and the right detail depends on whether the window is flanged or flangeless, where it sits in the wall, what the client wants for trim, what siding we're using, and whether there's exterior insulation and what type it is. One client lives in a wildfire zone, another has a tight budget, and another cares most about embodied carbon, so we're always choosing different strategies.
Mike is working through the same problem. "I'm still trying to find the best solution for how to stop and start the rain screen around window openings," he said. "You don't want dead ends." A dead end is anywhere air can't move through the gap, and it's where moisture hangs around.
What has changed is that we no longer start from scratch. At the beginning, we had very little idea about what we were doing. Now we've narrowed it down to a range of options we can choose from. I walked through one of those approaches on an ADU in Fine Homebuilding if you want to see how the pieces go together.
Rain screens over exterior insulation
Most of our walls have continuous exterior insulation, which I think of as a warm sweater for the building. It keeps the sheathing warm, and a warm sheathing is a dry sheathing. The rain screen battens go on the outside of that insulation, with long screws that run back through it into the framing.
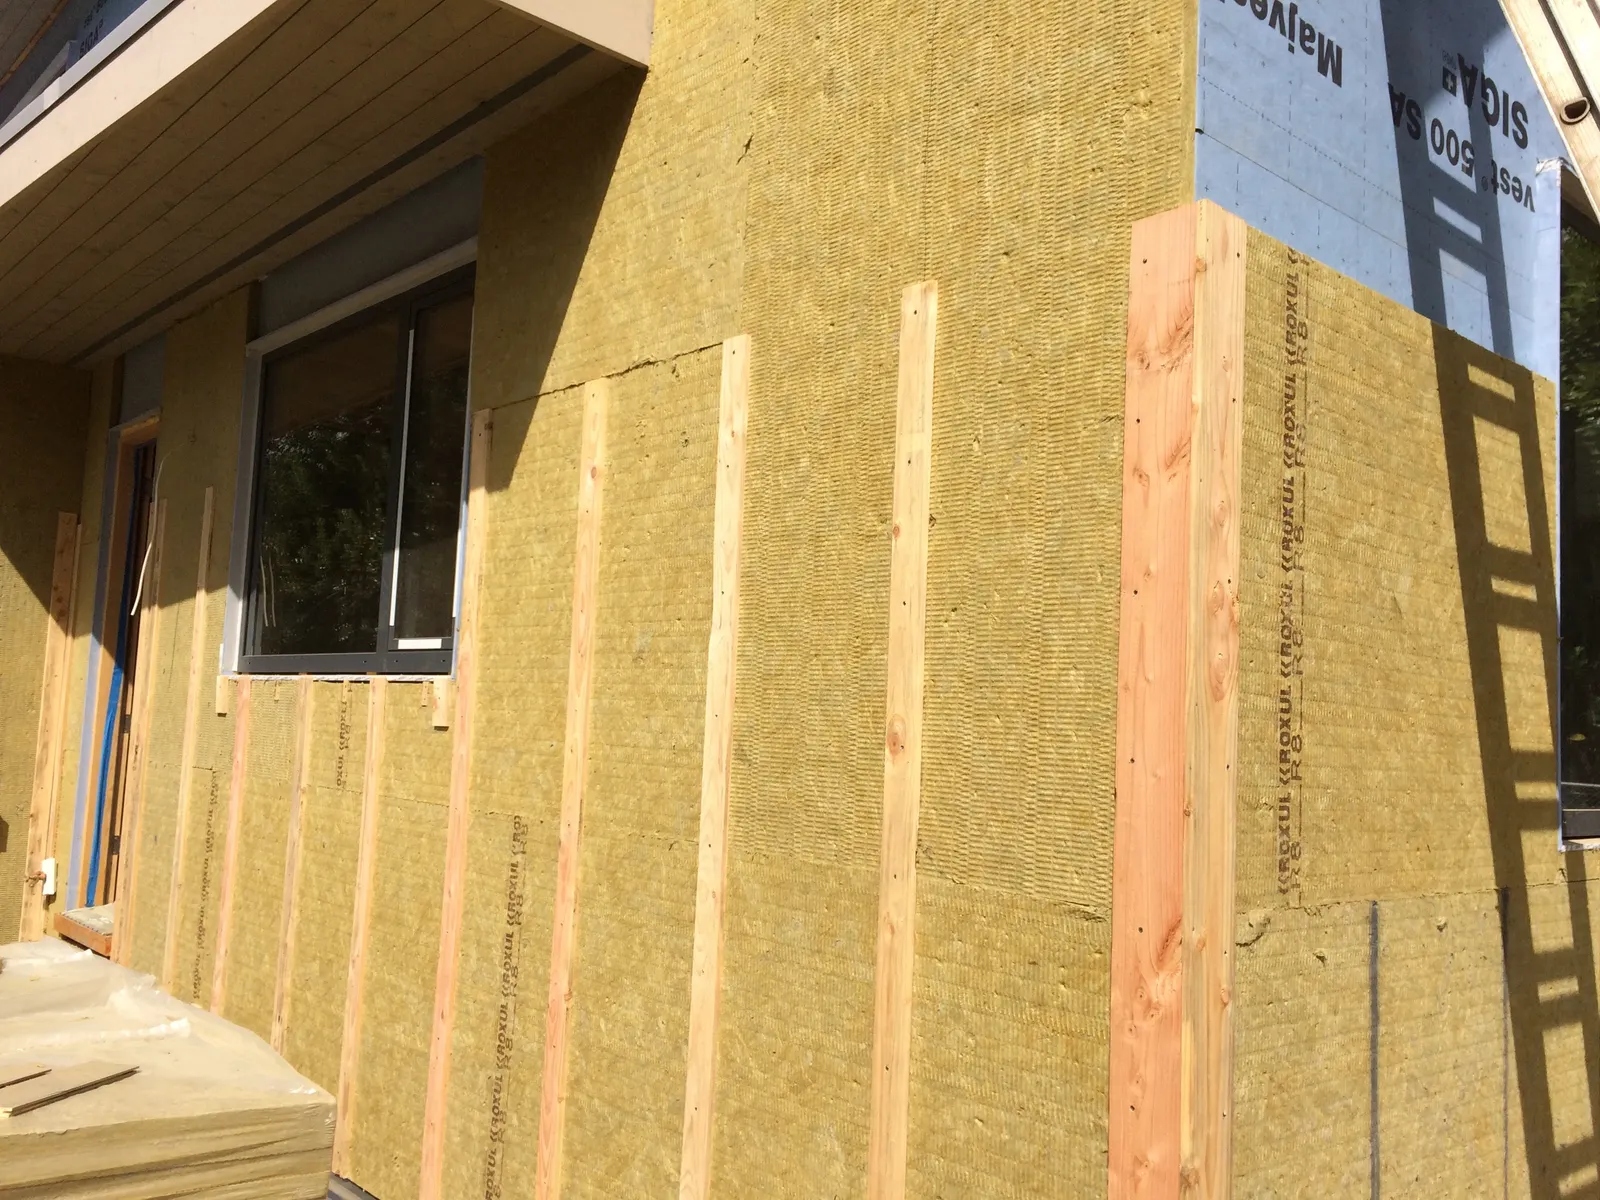
That setup makes vertical strips easy. It makes horizontal strapping for vertical siding harder, because as Mike pointed out, "the exterior insulation itself doesn't hold fasteners." Softer insulations can also crush under structural screws if you're not careful. I covered the options in detail in a deep dive on continuous exterior insulation for Fine Homebuilding.
Bug screens and ember screens
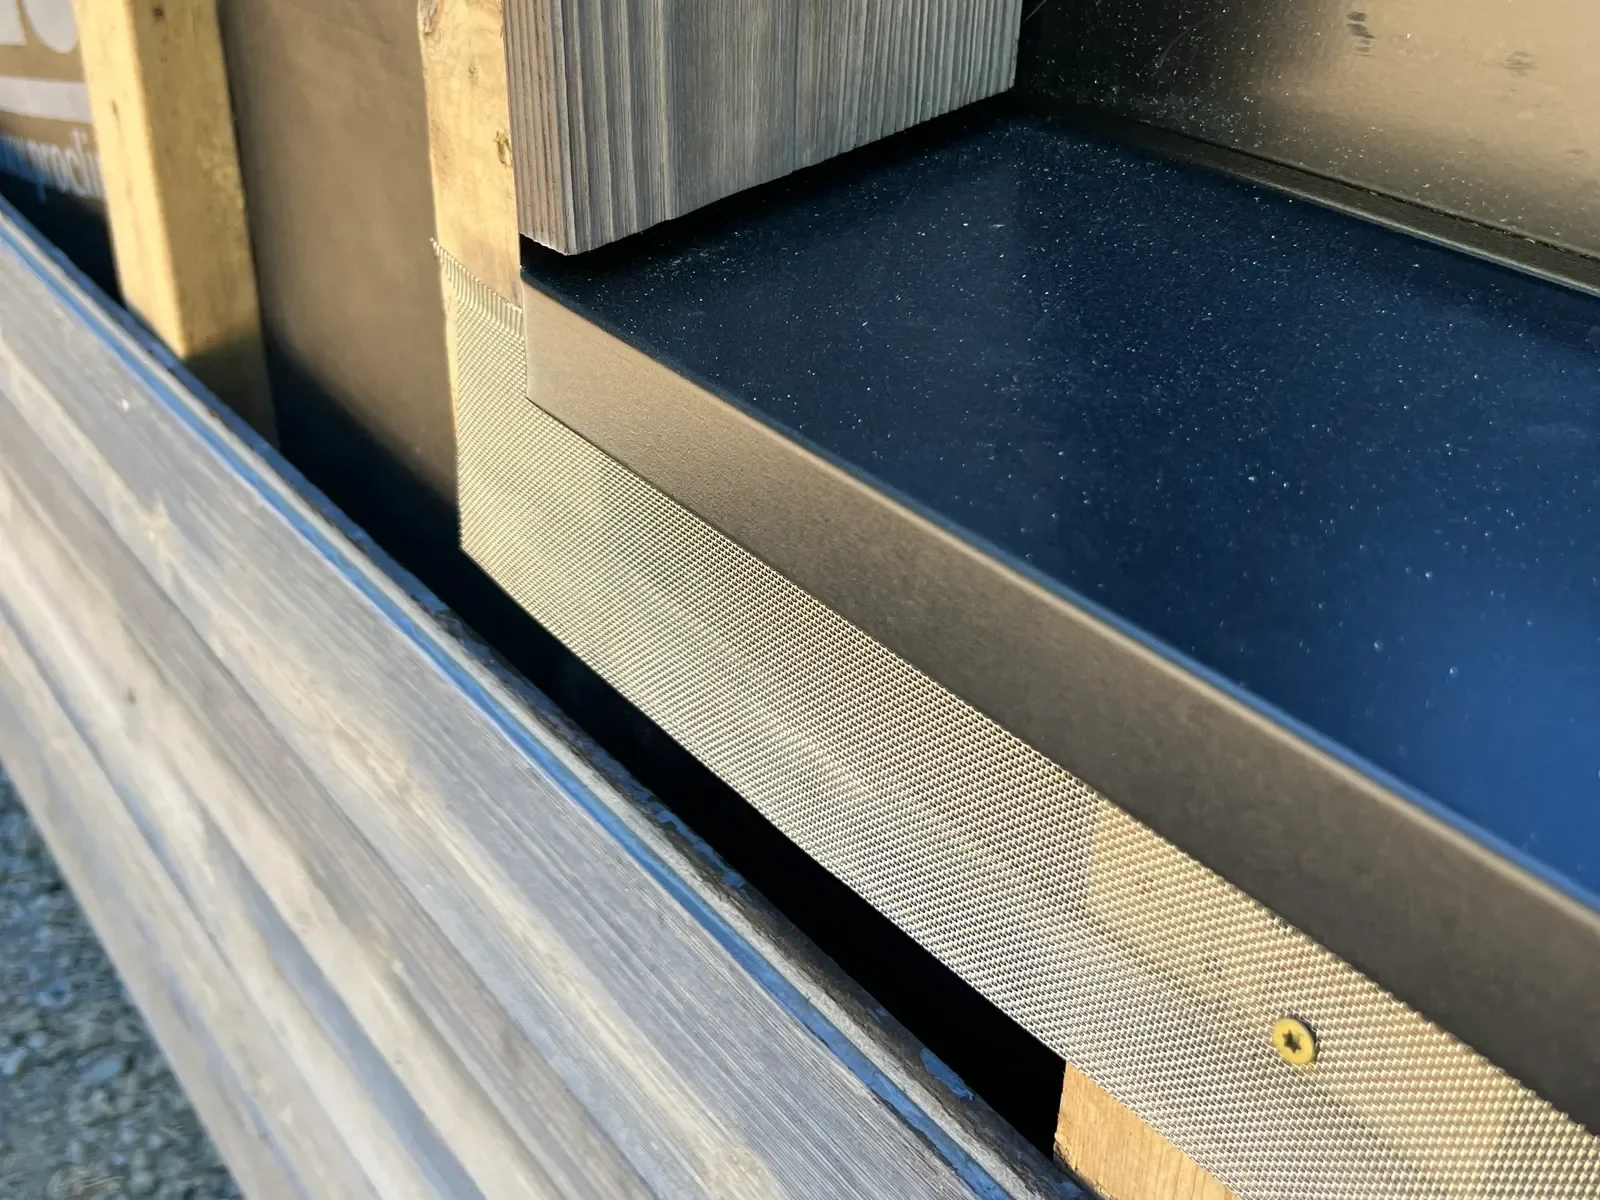
When we started, the open bottom of a rain screen meant bending your own screen out of whatever you had to keep bugs out. Now there are products made for it, including perforated flashing for the bottom of the gap, which can make life easier. We still often bend our own from rolls of stainless steel screen, because having custom stainless bent at a sheet metal shop gets pricey and doing it in house costs less.
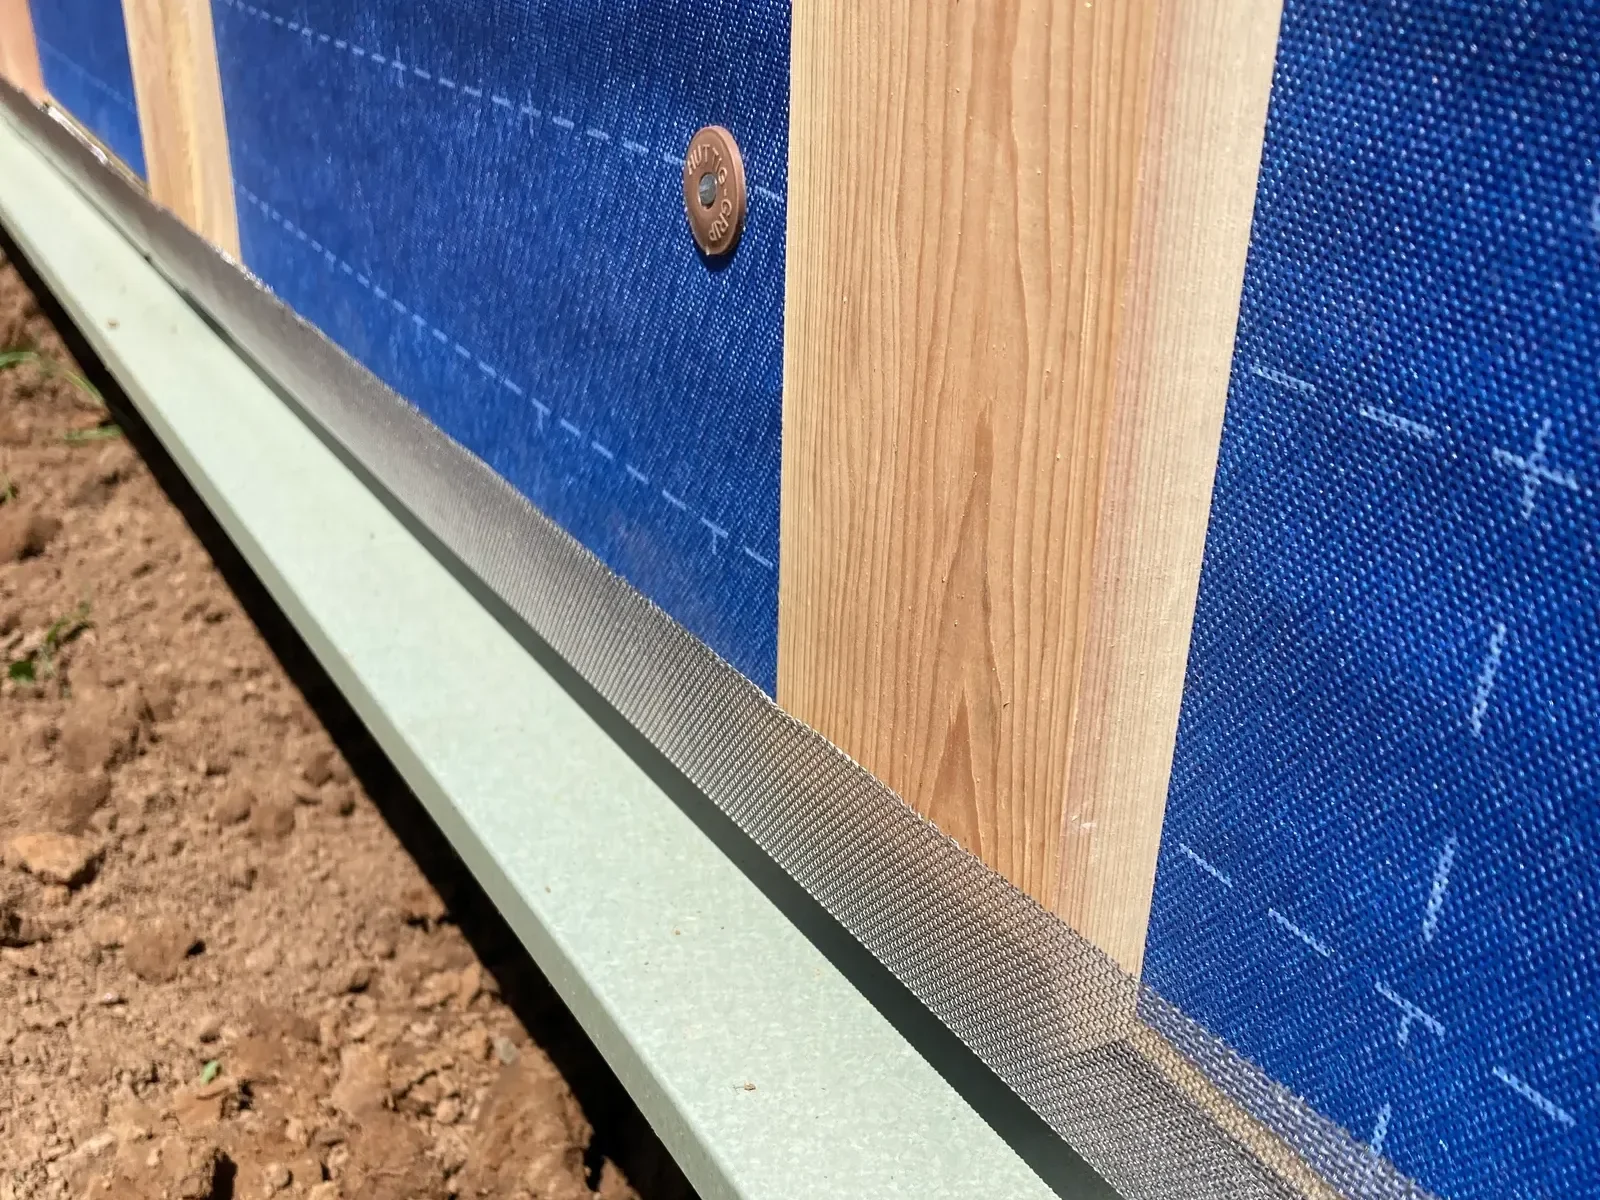
In wildfire zones, there are intumescent ember screens that swell shut when they encounter high heat or flames, which closes the gap before embers can get in. They aren't cheap. On a recent project, we put them only at the bottom of the gap, because that's where the air is being pulled in. You could make a fair case for the top as well, especially where embers are wind-driven, and I wouldn't argue too hard against it.
When you haven't seen a detail before
People often ask me for a checklist, something that says if this, then that, for every rain screen situation. I don't think one exists. Manufacturer websites can be a good starting point, and some good ones have step-by-step installs with and without exterior insulation.
The closest thing I have to a rule is the four control layers: water, air, vapor, and heat. For any detail you haven't seen before, trace each control layer through the whole assembly and make sure it's continuous. If one of them breaks, start over on that detail. I've done this in front of rooms full of builders and architects with details I'd never seen, and it works every time.
Mike thinks of the rain screen the same way. "It always has to be part of the cladding," he said, "and keeping it separated from the critical control layers that are the last means of defense is a good way to think of it."
The rain screen is one of the cheapest ways I know to make a house last a long time. And if you ever get the chance to stand at the top of one on a sunny day, do it. You'll feel why it matters.
Rain Screen FAQs
What is a rain screen?
A rain screen is a gap between your siding and the water-resistive barrier (WRB) behind it. Any water that gets past the siding has a clear path to drain out the bottom, and air moving through the gap dries what's left. We build ours ventilated at the bottom and the top, not just as a drainage layer.
Is a rain screen worth it?
For us, yes. We never do a siding project without one. A rain screen costs money and time, and a dry climate is more forgiving, but here in marine climate zone 4C it's damp much of the year. A wall that can drain and dry is one of the cheapest ways we know to make a house last.
How big should a rain screen gap be?
We like to see at least 3/8 inch, because that's where you start getting real airflow and drying. Past about 1 inch, fire risk starts to rise, which matters in wildfire country. Mike Maines breaks down gap size in detail in his post on rain screen gap size and furring strips.
How do you build a rain screen behind vertical siding?
Vertical boards need horizontal strapping to nail into, and horizontal strips block drainage and airflow. The options are cross-hatched strapping, which makes a gap about 1 1/2 inches deep, strips run at 45 degrees, or rigid products made to stand the siding off the wall. Diagonal strapping works, but it gets complicated around windows and doors.
Can you use ripped fiber cement strips as rain screen battens?
We'd avoid it. On one house we opened up, driving coated screws through fiber cement battens ground the coating off, the screws rusted through, and whole sections of siding came off by hand. Be careful using any material off-label, even one that seems durable.
Do rain screens need bug screens or ember screens?
The open bottom of the gap needs a screen to keep insects out. Perforated flashing made for rain screens works, and we often bend our own from stainless steel screen. In wildfire zones, intumescent ember screens swell shut in high heat. We've put them at the bottom of the gap, where air is pulled in, and there's a fair case for the top too.
For the bigger story of how rain screens went from a hard sell to standard practice, read Rain Screens, 15 Years In on the IMW blog.
Josh Salinger is the Founder & CEO of Birdsmouth Design-Build.