
Green Building Advisor - Wildfire Resilience: Slab-to-Wall Connection
January 21, 2026, by Joshua Salinger
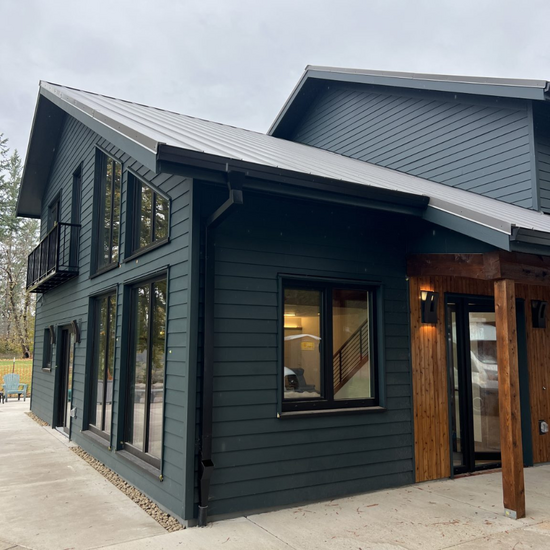
As a companion to our previous article “Rebuilding After the Fire” about building in the Wildland Urban Interface (WUI), we want to dig into a few of the details that our firm, Birdsmouth Design-Build, employed on Linda and Evan’s Oregon home to find the intersection between fire resilience, passive house benefits, and cost effectiveness to deliver a durable, healthy, comfortable, and resilient home.
We leverage the iterative design-build process by bringing our in-house architecture team together with our in-house build team to find the best-performing details that are cost effective, buildable, and that meet the needs of our trade partners, materials suppliers, the context of the site, and the goals of our clients. Though the years we have come up with a quiver of details that get adjusted and refined for each specific project depending on the circumstances. The following three-part series focuses on details that we found to be super effective for meeting all of our shareholders’ goals on Linda and Evan’s home. We hope you find them useful.
Foundation to wall
The foundation-to-wall detail is a demanding part of the enclosure. It is one of the leakiest areas of a house, which can lead to moisture deposition and comfort problems. It must shed bulk water away from the building and footings—typically with a slope leading away from the home and footing drains to daylight—while also including a capillary break so concrete does not wick moisture into the wood framing.
Thermally, the slab edge is a major bridge; roughly 60% of slab heat loss can occur at the perimeter, so a thermal break is critical. This can be tricky when the slab is the finished floor and the perimeter insulation cannot be exposed. Structurally, this junction carries significant gravity and shear loads and must be detailed for anchors and hold‑downs, particularly in seismically active regions like the Pacific Northwest. Finally, on a WUI site, this all has to be accomplished with fire-resilient materials and surrounded by a 5‑ft. noncombustible zone. One wants to do all of this while using simple, cost‑effective details that won’t lead to complicated origami or construction-sequencing issues.
The final detail
In the end, the detail our team landed on is deceivingly simple and meets all of Phius’s certification criteria. All four control layers (water, air, thermal, and vapor) are continuous, with the air barrier transitioning from the sub-slab vapor-control layer under the bottom plate to both the Zip System sheathing and the stem wall, taped with Siga Fentrim.
Bulk water is handled by 3/4-in. gravel below the sub-slab insulation, a perforated pipe at the footing wrapped in clean gravel leading to daylight, roof gutters connected to an ABS pipe which is also daylighted, and a sloped grade that sheds water away from the building.
The thermal-control layer is handled with 4 in. of XPS below the slab, with a 2-in. piece upturned at the interior perimeter of the stem wall. On the exterior of the stem wall, 1-1/2 in. of rigid mineral-wool board goes from the top of the stem wall down to the footing. This effectively isolates the foundation from the ground, which was verified after Phius requested a THERM model done at this location. There were no significant thermal bridges to be found.
Structural integration
We worked with our structural engineer to offset the bottom plate toward the interior of the building. He needed 2 in. of concrete on either side of the J-bolts and hold-downs, which allowed us to block out a section of the top/interior part of the concrete form and minimize the stem wall thickness to 4-1/2 in. Keep in mind that we are building in Seismic Zone D (Severe), so this foundation is engineered to handle the stresses of a large subduction earthquake.
The 2×6 bottom plate needed 1-1/2 in. of solid wood between the hole for the hold-downs and the edge, so we were able to set the plate 1/2 in. in from the exterior edge of the stem wall. This allows us to have our sheathing in plane with the stem wall, which makes for easy air-sealing with Siga Fentrim tape, and to have our 1-1/2-in. mineral wool board align with the 1-1/2-in. cork above it, keeping it all in plane for easy constructability, no thermal bridges, and pleasing aesthetics.
On the interior, the benefit of moving the plate inward is that it covers all but 1/2 in. of the upturned XPS board. This tiny scar will get further buried in the 5/8-in. drywall and a 5/8-in. baseboard. Our walls are framed at 24-in. O.C. and filled with dense-packed cellulose, so 5/8-in. drywall helps minimize bulging while also adding thermal mass to the building, which is a slight benefit to the energy model.
Construction sequence
This turned out to be a pretty straightforward installation; the trickiest part was setting a 2×12 in the form during the concrete pour. The footing and stem wall were poured at the same time, and after they had cured, stripping the forms and the 2x wasn’t too big of a deal for our concrete partners. Setting the foundation water control with the clean gravel and drains was typical and uneventful. Same with the bottom plate—besides being offset, it was straightforward. We were sure to keep the Zip System held up 1/2 in. from the concrete when sheathing the walls as to prevent any capillary wicking. The air barrier connection was made by folding down the 10-mil poly air and vapor control layer about 1 in. down the outside of the stem wall, and then this was bridged by 4-in. Siga Fentrim tape that connected the Zip to the poly and the poly to the concrete. We set the rigid mineral-wool board at the same time as the river rock, which held it in place really well.
Final appearance and adaptability
In the end, the river rock looked great, and it provides a combustion-free transition at the perimeter of the building that also works well from a water-control standpoint. In colder climates, I would imagine the stem wall insulation would travel down below the frost depth along with the stem wall. If one was wanting Phius certification, it would likely be good to run a THERM model to verify there are no significant thermal bridges. We are aware that here in the Pacific Northwest we live in a Goldilocks climate zone (4C), but I do think this detail would translate well in colder climates.
Josh Salinger is the founder and CEO of Birdsmouth Design-Build, a residential construction company in Portland, Ore.